Ralph Scherder
Ralph is an Award winning author from Butler County. His work has been published in numerous magazines, including, Bowhunter,Fur-Fish-Game, PA Game News, and The Trapper. He is also author of the book, “The Taxidermist’s Son”.
Trapping Pennsylvania Fishers
By Ralph Scherder
The 2016-17 Pennsylvania fisher trapping season is slated for December 17-28. That’s welcome news to trappers who’ve argued in the past that a six-day season was way too short for an animal with a home range of up to 10 square miles. The extended season is indicative of a burgeoning population that has seen fishers expand and thrive in areas where they haven’t lived in almost a hundred years. With more WMU’s open to fisher trapping, trappers will have increased opportunities to harvest one of these magnificent little critters.
Locations
For fishers, location is and always will be key. You can’t catch them, after all, if they’re not present. The problem, though, is that fishers aren’t like raccoons or beavers, which leave an abundance of sign everywhere they go. Fishers are more like mink. Even in the best habitat, you’ll rarely find tracks or other evidence they’re around. But if the habitat is good you have to assume that fishers, like mink, are present.
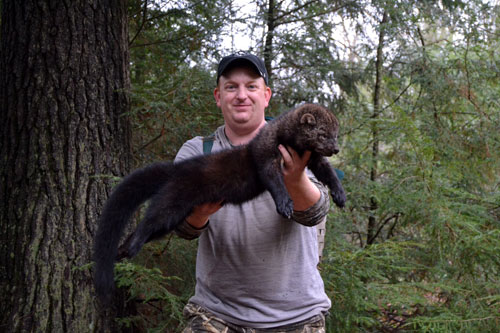
IFishers are circuit runners. They may only pass through an area once a week. That’s not very often, and even with a longer trapping season, you still have to be on location to connect on one. Fishers hunt in zigzag patterns and prefer areas with continuous ground cover. The more ground cover the better, but they also like a few bigger trees mixed in, especially if those trees are conifers.
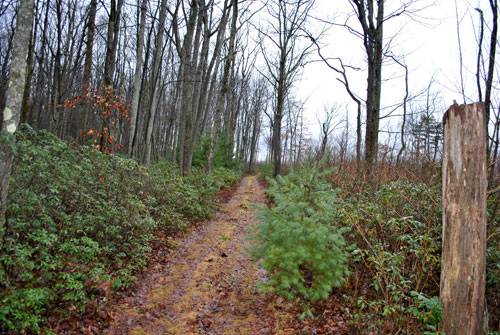
Terrain is an important consideration as well. Try to find areas that have funnel characteristics, such as where different types of terrain come together, short draws intersecting larger hollows, or along prevalent edges and creeks. Many of the locations I trap have been recently logged. Around many of these areas, the DCNR has constructed fences designed to keep deer out so that the habitat within can regenerate properly. Naturally these areas inside the fences are thick with underbrush and a magnet for small game and rodents. Prime hunting grounds for fishers.
Simple Sets
Anywhere fishers are found, the most common way to trap them is with 220 or 160 bodygrip traps used on leaning pole sets. However, in Pennsylvania, 220 bodygrips are illegal to use on land and 160s must be set within the banks of an established watercourse. Other restrictions also make them an impractical choice for Pennsylvania trappers.
Leaning pole sets might still have been a viable option except that one of the main attractions of the set is having a visible bait. In Pennsylvania, bait that is visible from the air is illegal. My go-to setups for fishers are #2 coilspring traps in dirthole sets.
By far, the dirthole set is the best set ever invented for land trapping. It can be used to catch everything from raccoons to fox to coyotes and, as I discovered, fishers.
I construct my dirthole sets a little differently than I do for canines. I make the holes slightly bigger and I’m not as concerned about making a mess. I typically make the hole four to five inches in diameter and about six inches deep. After bedding the trap in front of the hole and sifting enough dirt over to cover it, I dump the debris along the edge of the dirt pattern for extra eye appeal. Most of the sets are made against a natural hollow log, stump, or mound of dirt – anything with eye appeal.
Because fisher season opens in December, weather can be a factor. Subfreezing temperatures and snow can render traps inoperable. To counter the elements, spray every set with glycol or some other type of antifreeze.
Loud and Stinky Baits
Unlike trapping for fox and coyotes, it’s almost impossible to spook a fisher by using too much or too loud of a lure or bait. Two scents in particular seem to pull them in better than anything else – skunk essence and beaver castor. If you’re going to trap fisher this winter, carry plenty of both.
All bait goes into the bottom of the dirthole. On the top lip of the hole, I smear fresh beaver castor or a castor-based lure. Finally, a foot or two from the set, and a foot or two off the ground, I apply a heavy dose of skunk essence to a cotton ball. Placing the skunk essence slightly off the ground allows the scent to disperse better than if placed directly on the hole. Don’t skimp on the amount of lure or bait used at a set.
Stay the Course
The most important part of fisher trapping is to not get discouraged. Even if you have empty traps the first three days of the season, it’s important to keep a positive attitude and stay motivated. Teaming up with a fellow trapper is a great way to run a fisher trapline, especially if trying it for the first time.
Fisher trapping can test your patience. It’s important to remember that a season is a season, whether it’s only six days long or twelve. Success can happen on day two or ten, but it won’t happen at all if you don’t put forth the effort.
By Ralph Scherder
Ralph Scherder is an award winning outdoor writer and photographer from Herman, PA. Visit him on Facebook at Bandit Outdoors.
Planning an Out-of-State Hunt
By Ralph Scherder
What’s your dream hunt? New Mexico elk? Wyoming mule deer? Alaska Dall sheep? Mine was Colorado mountain lion, and in December 2012, I finally realized that dream, but not until after years of planning and some hard luck along the way.
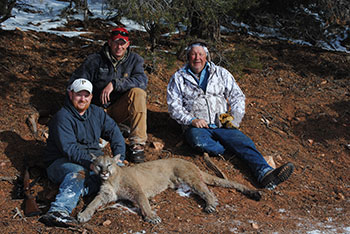 My first attempt at a mountain lion was actually December 2011. Unfortunately, we had unseasonably warm weather during the hunt and hardly any snow. Daytime temperatures shot up into the 50s and 60s and each day the snow melted a little more until it was virtually hopeless. Luckily, the guide had a clause in the contract to allow for such things and I returned the next year at half price and fulfilled my dream. The moment I touched that lion, a wave of emotion swept through me, and I realized it had been well worth the wait and the money and effort it took to make it happen.
Making it Affordable
Think of big game hunting and you’re likely to thing about cost first. And it’s true – traveling out of state to hunt is not cheap. However, there are things you can do to make it more affordable.
1. Budget money specifically for hunting, even if it’s only $50-100 per month.
2. Take a buddy. Many outfitters give discounts for referrals or for bringing a friend.
3. Book a couple years in advance to lock in this year’s price. Let’s face it, the cost of everything is going up, and big game hunting isn’t getting any cheaper. But if you book hunts at least two or three years in advance (which most outfitters will let you do), you can beat inflation and still have a good length of time to make payments.
4. Look for cancellation hunts. Every year, outfitters have clients who put deposits on hunts and then cancel last minute, so they offer the hunt to others for the balance. For instance, last year I saw a listing on an agent’s website for a grizzly bear hunt in the Brooks Range in Alaska. Regular price was $12,500 but the hunter who cancelled had a $5,000 deposit, so the hunt was now being offered for $7,500. That’s quite a savings.
5. Get a loan. I have a friend who goes on a big game hunt every five years. He’s 40 years old and has taken four big hunts that cost about the same as a new vehicle. He affords it by taking out a low interest loan, then paying it off. Once it’s paid off, he takes out another loan and goes hunting, and repeats the cycle.
 Look for Value
How much a hunt costs doesn’t always tell the whole story. When searching for an outfitter for a Newfoundland moose hunt, for instance, I found that the going rate ranges from $4,500 to $5,500. Some outfitters offer a limited number of “trophy” hunts in more secluded areas for up to $2,000 more. Over the course of a few weeks, I called about a dozen outfitters and viewed the websites of at least two dozen more. Although a good many of them were offering hunts for $4,500, they often did not include the cost of the hunting license and moose tag (approximately $500) or the cost of the bush plane from the airport to camp or other transportation (up to another $500).
The base price for a hunt is simply that – a starting point. When I came across an outfitter who charged $5,500 for his moose hunts, he quickly pointed out that he includes all licenses and tags as well as a bush plane from the airport to camp. So even though his list price was a thousand dollars more than the others, I realized it actually worked out about the same after all costs were factored in.
Do Your Research
We live in a world where any information we need is right at our fingertips. Use that to your advantage. Do searches and read reviews and never book a hunt without talking to an outfitter on the phone. Here are some questions I like to ask and why:
1. How many hunters do you book every year? I try to avoid places that are over hunted.
2. What’s the average size of the animals harvested? As a general rule, I deduct about 10% from whatever they tell me, not because I think they’re lying but because I know from experience that animals are seldom actually scored or measured by guides or outfitters. They’re just estimating, and they usually err on the high side.
3. Success rates? In recent years, the term “shot opportunity” has replaced success rate because it’s a higher number and makes the outfitter look more successful. I don’t have a problem with this because if an outfitter does his job and gets you a good opportunity at a trophy animal, it’s not his fault if you miss.
4. What are the main factors why some hunters are unsuccessful? This will help give you an idea of what you need to do prior to the hunt, whether it’s practice longer range shooting or get into better physical condition for a demanding hunt. And really, not counting poor weather, those are the two main reasons most hunts are unsuccessful. You can’t do anything about the weather, but you can become better with your weapon of choice and get into shape.
5. What do I need to bring? Although most of us know what we need, an outfitter may suggest something that will help you in that specific part of the country that you may not have thought of.
Final Thoughts
Always take notes when talking to an outfitter about a hunt. Don’t rely on memory. Things can get awfully jumbled once you start chatting with several outfitters and it’s hard to keep track of who said what. Talking to references can be good, too, just remember that most references are hand selected by the outfitter – still, they can help give you a better idea about what to expect.
Always make sure there is a contract for the hunt. Typically, once an outfitter receives your deposit, they will issue a contract. Read the terms and conditions of the hunt carefully. This is the time to consult your notes from your initial conversation when you booked the hunt. If anything seems off, or if things aren’t as they said they would be, don’t be afraid to ask questions. A reputable outfitter will answer all of your questions openly and honestly.
Always talk to more than one guide or outfitter. It can be a long process deciding which outfitter to go with, but be patient. Weigh out the positives and negatives. You’ve spent years saving up the money to go on the hunt of a lifetime, so now isn’t the time to rush into anything. Be patient, do your research, and ask questions and you will have a great experience.
By Ralph Scherder
Hunting the Second Rut
By Ralph Scherder
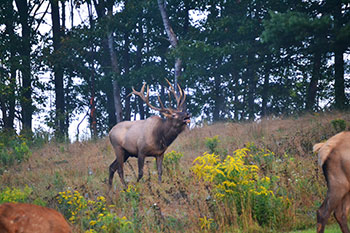
One month after the November rut, whitetails experience another rut. This second rut, while not nearly as intense, still offers a great opportunity to harvest a mature buck.
Not every doe gets bred during November. Some does, for instance, simply don’t have the body weight necessary to become pregnant and need an extra month to physically mature. Any doe that was not bred during the first rut will come back into estrus about 28 days later. Mathematically, that means we can potentially encounter second rut activity from early December to early January here in Pennsylvania – although in 2012, while bowhunting in Ohio, I witnessed a big buck breeding a doe in late January.
Estrus cycles among does vary greatly in terms of time and duration. Rut inhibitors, such as unseasonably warm weather, can make the first rut weaker and more drawn out over a period of time, which means the second rut will occur much later than usual later on. I’ve always believed that once mid-October comes, it’s possible to encounter a rutting buck clear through till the end of the late archery season in January.
Find the Doe Groups
Hunting the second rut is different than hunting the first rut in that very rarely will you see bucks actively chasing does, at least not with the same kind of intensity. Right now, their primary focus is on food and replenishing all of the nutrients they lost during the first rut. Rather than roaming the countryside looking for receptive does, they take a much more subtle approach by habiting feeding and bedding areas where doe groups are found – especially doe groups that contain at least one or two yearlings.
Staying close to doe groups allows bucks to expend the least amount of energy while waiting for females to come into estrus again. That’s why it’s common to see a single buck tagging along with a large group of does this time of year. Also, several theories suggest that populations with higher doe to buck ratios tend to experience more second rut action simply because there aren’t enough bucks to breed every single doe during the relatively short window of first rut.
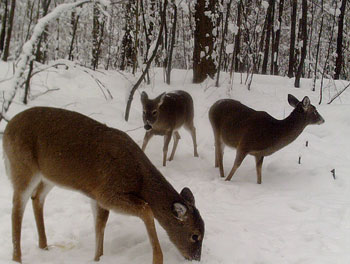 One of the most effective ways to find doe groups is with trail cameras. In 2010 I used trail cameras to locate a doe group after rifle season, and every night they visited the same white oak flat. Eventually a buck showed up – not just any buck, though, a drop-tine buck that I’d been after all season long. That particular deer was unique in that the drop tine actually jutted out from the base of its left beam and angled out over its left eye. According to trail camera photos, the buck alternated regularly between feeding and checking out does. Several days later, another buck of similar size showed up on the camera along with the drop-tine buck. Two days after that, a third buck arrived on the scene.
It was now muzzleloader season, and although I knew the bucks were in the area and I hunted every day, almost all of the activity was occurring at night. That all changed, however, when a cold front moved in and we experienced several days with highs in the single digits. Suddenly those deer started showing up earlier and earlier, and the drop-tine buck’s patience for the other two wore thin when a small doe in the group came into estrus. Trail camera pics showed the drop-tine buck locking antlers with a slightly smaller 8-point.
Stand Locations
My stand location was in a funnel between the feeding area and bedding area, which is one of the keys to second rut success. I like to get as close to the bedding area as possible without spooking the deer. Also, I invariably set up in the thickest cover I can find. Foliage in the winter is at its thinnest and many of the stand locations I hunt during the early season are just too open to offer any type of concealment. Keep in mind, too, that by the time the second rut rolls around, deer have been pressured all season long. They’re going to stick to thick cover and not be so willing to stroll through the wide open during daylight hours.
Even though most of my late season hunting is done with a muzzleloader, I still prefer to set up my stands as if I’m hunting with a bow. The tighter the location the better. I want the first time I see that buck to be when it’s already within range, which gives the deer less time to possibly bust me.
Grunt Calls Still Work
When I finally returned to hunt for the drop-tine buck, I kept in mind the trail camera photo I had of it fighting with the other 8-point and made sure to pack my grunt call. I’m not a big fan of rattling during the second rut because it takes a very aggressive buck to respond to it, and this time of year bucks don’t often go looking for a fight. In my experience hunting the second rut, a grunt call is enough.
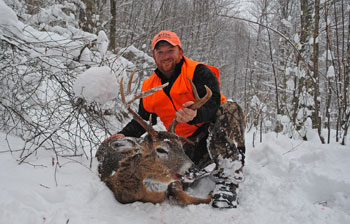
About three in the afternoon, I made a series of short, loud, tending grunts to simulate that another buck was in the area with a hot doe. I no sooner put the grunt call back into my pocket and the drop-tine buck appeared, at a dead run, heading straight for me. He got within 50 yards and I dropped the hammer. When the smoked cleared, I found the buck piled up within a hundred yards of my stand.
Dress for Success
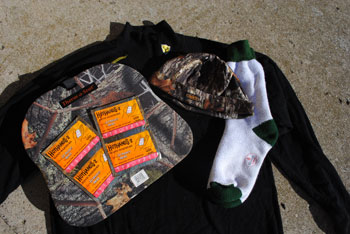 Truly, one of the toughest challenges of hunting the second rut is dealing with cold weather. I like to layer my clothing and carry plenty of hand warmers. I place a hand warmer in each pocket of my pants as well as in each pocket of my jacket, and I always have more in my backpack in case I need them.
Another item not to be overlooked is a warm seat. Most of the hunting I do is from ladder stands and those metal seats can get mighty cold in the winter. I prefer a detachable seat pad that I can carry in and out with me each time I hunt.
Food and water also come in handy. I take snack foods that are high in protein, such as trail mix and granola bars. They’re high energy foods that help your body fight the cold so you can stay on stand longer. Whether you’re hunting early or late season, success in the deer woods seldom happens quickly. The best way to improve your chances is to make your time on stand as comfortable as possible so you can stay in the woods longer and be ready when the opportunity finally presents itself.
By Ralph Scherder
Ralph is an Award winning author from Butler County. His work has been published in numerous magazines, including, Bowhunter,Fur-Fish-Game, PA Game News, and The Trapper. He is also author of the book, “The Taxidermist’s Son”.